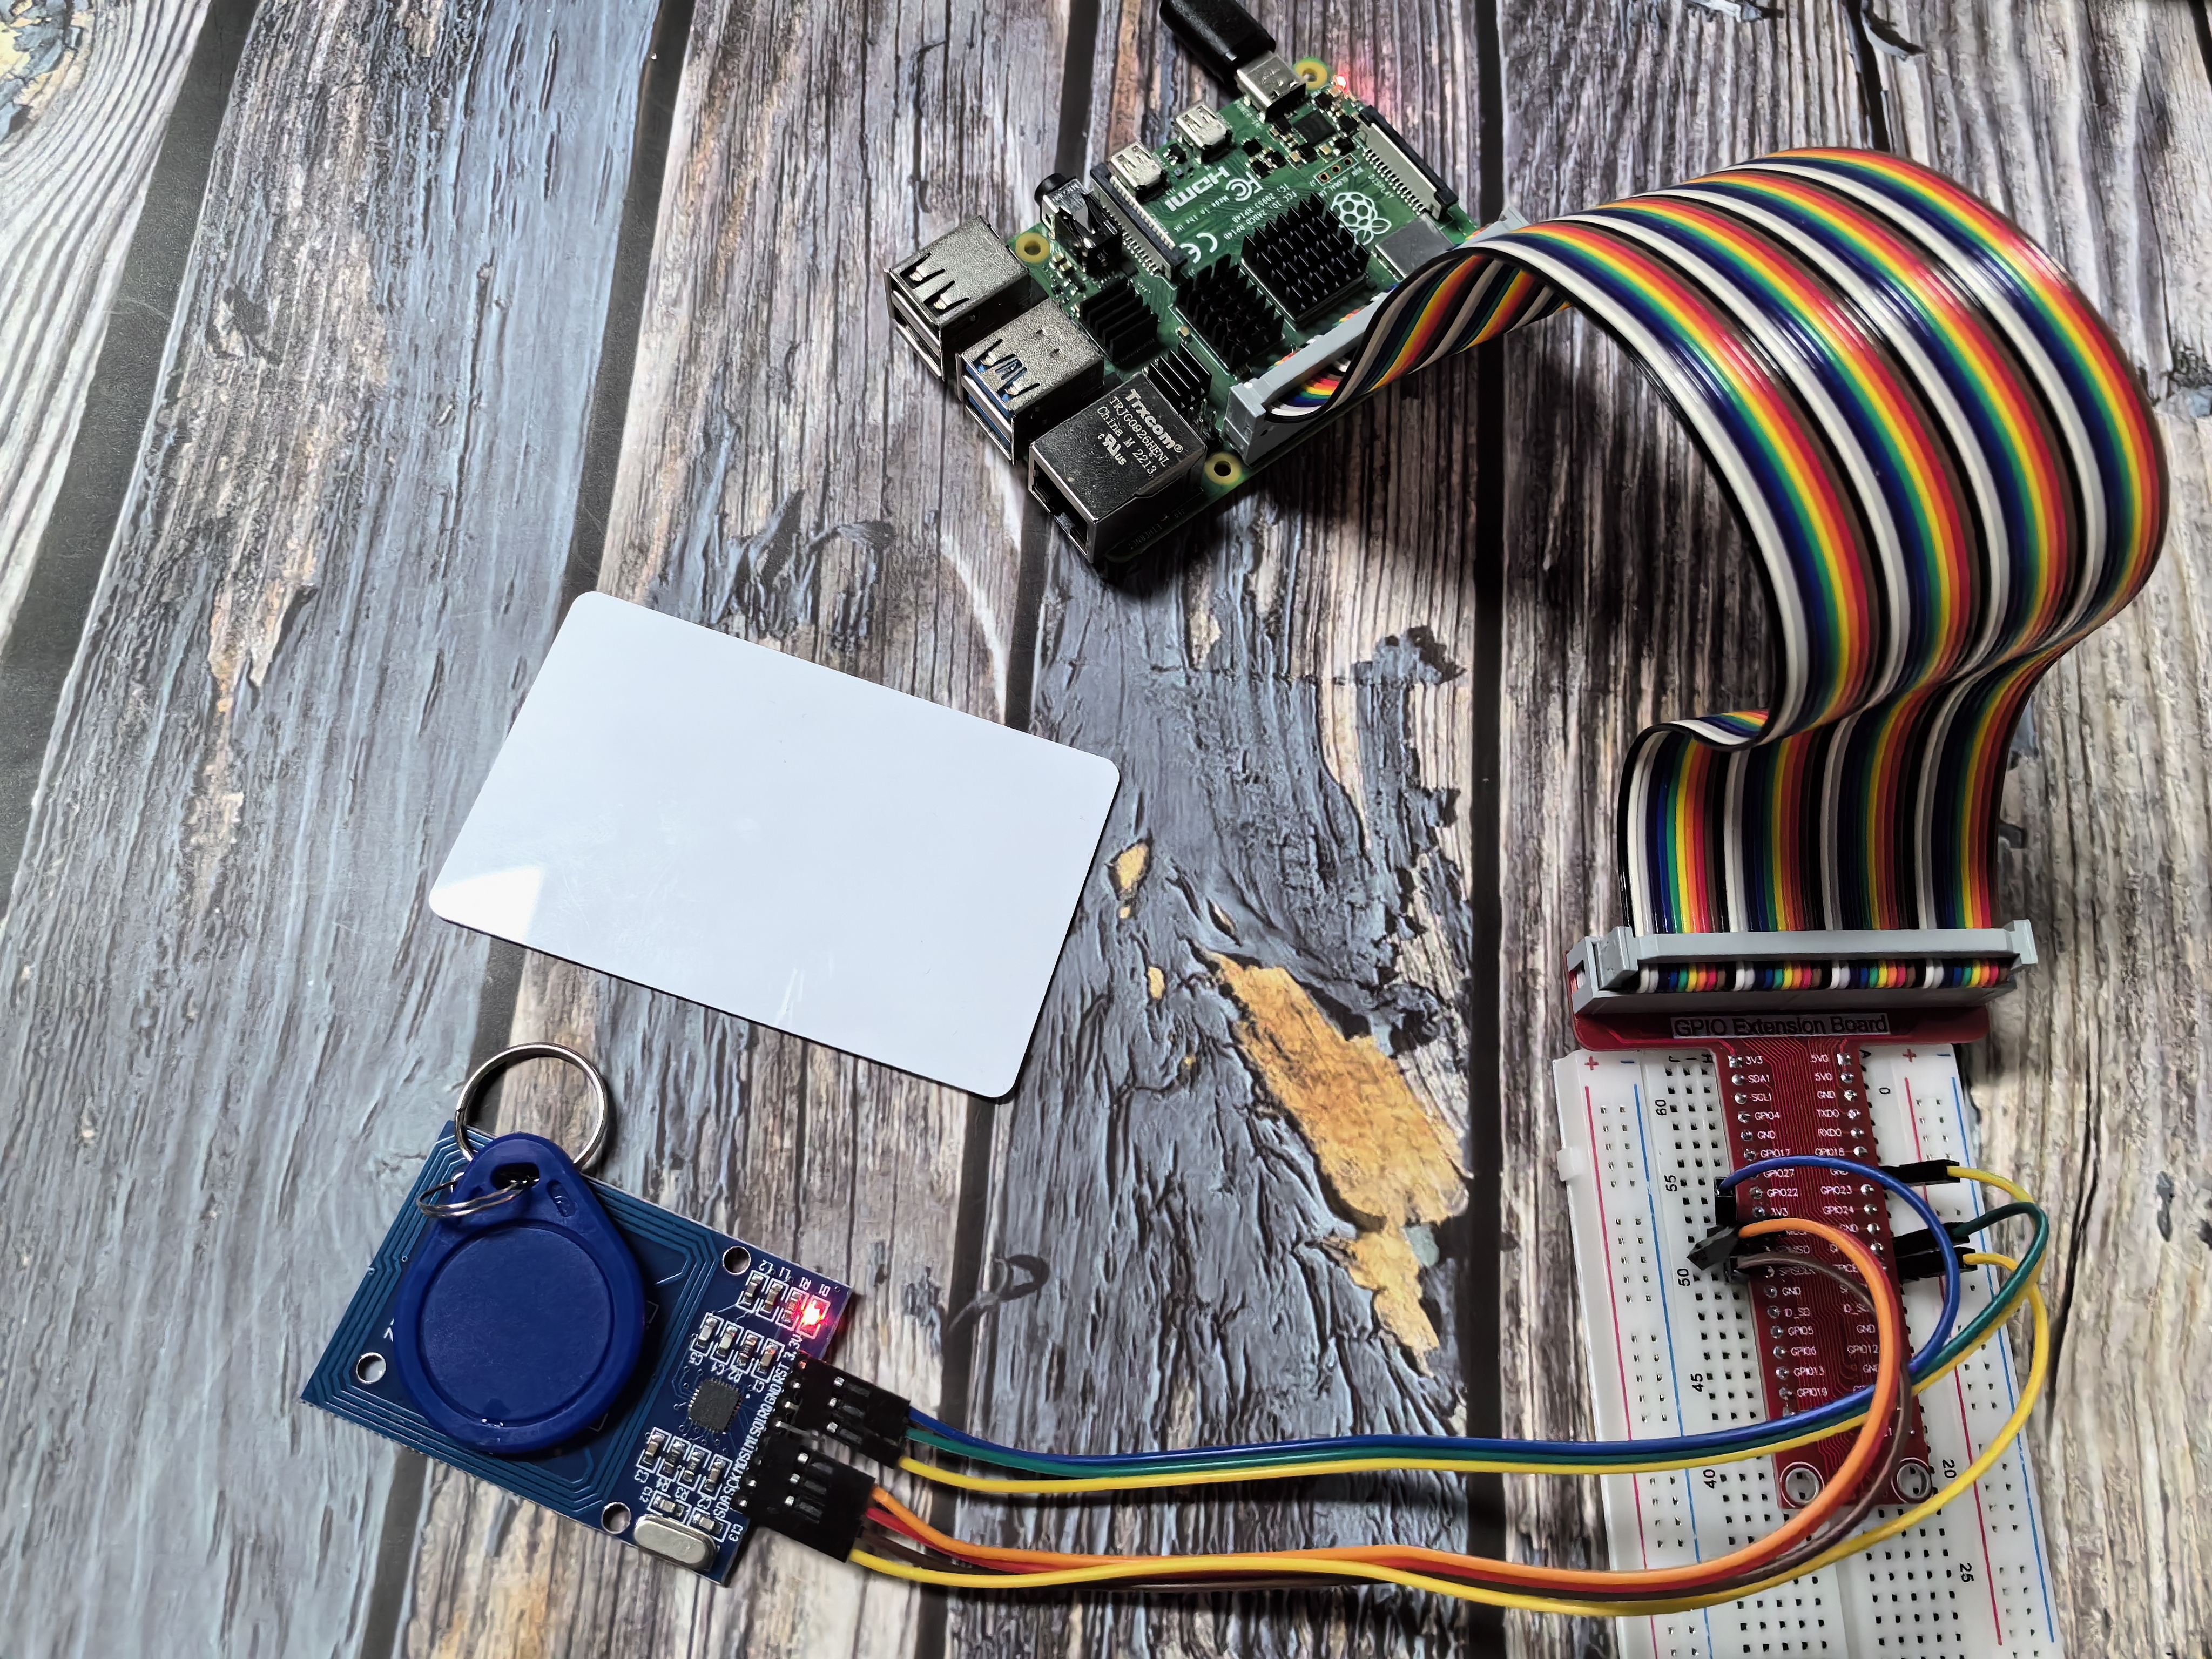
2.2.7 MFRC522 RFID Module
Introduction
In this beginner-friendly project, you’ll learn how to use RFID (Radio Frequency Identification) technology to wirelessly read and write data to special cards or tags! Think of it like a magical way to identify objects without touching them - just like how you tap your credit card or phone to pay, or use a key card to enter a building.
In this project, we’ll explore how to read information from RFID cards and even write new data to them using the RC522 module.
Components

What is RFID Technology?
RFID stands for “Radio Frequency Identification” - but think of it as “wireless identification” that works like magic! It’s a way for devices to “talk” to each other using invisible radio waves, without any physical contact.
Real-world examples you already know: - Contactless payment: Tap your credit card or phone to pay - Building access cards: Swipe your student ID or office key card - Pet microchips: Vets can scan to identify lost pets - Inventory tracking: Stores use it to track products - Public transport: Bus/subway cards that you tap - Car key fobs: Modern car keys that unlock doors automatically
How does RFID work? (The Simple Version)
The two main parts: 1. RFID Reader (RC522 module): The “question asker” - sends out radio waves asking “Who are you?” 2. RFID Tag/Card: The “answer giver” - responds with its unique ID when it receives the radio waves
The conversation process: 1. Reader broadcasts: “Hello, is anyone there?” (sends radio waves) 2. Tag receives power: The radio waves actually power up the tag (no battery needed!) 3. Tag responds: “Yes, I’m here! My ID is 123456789” (sends back its unique information) 4. Reader processes: “Got it! I now know tag 123456789 is nearby”
What’s inside an RFID system?
RFID Reader (RC522 Module): - Antenna: Sends and receives radio signals - Processor: Manages communication and data processing - Interface: Connects to your Raspberry Pi via SPI
RFID Tags/Cards: - Microchip: Stores the unique ID and any additional data - Antenna: Receives power and sends data back to reader - No battery needed: Gets power wirelessly from the reader’s radio waves!
Two types of RFID tags:
Passive Tags (what we’re using): - No battery: Powered by the reader’s radio waves - Short range: Work within a few centimeters to meters - Cheap and simple: Perfect for learning projects - Examples: Credit cards, access cards, inventory tags
Active Tags (more advanced): - Have batteries: Can transmit farther and store more data - Longer range: Can work from several meters away - More expensive: Used in specialized applications - Examples: Toll road transponders, vehicle tracking
Key advantages for beginners: - No contact needed: Just bring the card close to the reader - Works through materials: Can read through plastic, paper, even thin walls - Fast identification: Instant response when card is detected - Reusable: Can read the same card thousands of times - Programmable: Can store custom data, not just ID numbers
Perfect for projects like: - Access control system: Only certain cards can unlock something - Attendance tracker: Scan your card to record when you arrive - Smart pet feeder: Only feeds when the right pet’s tag is detected - Inventory management: Track which items are where - Interactive games: Different cards trigger different actions - Personal identification: Create your own smart ID system
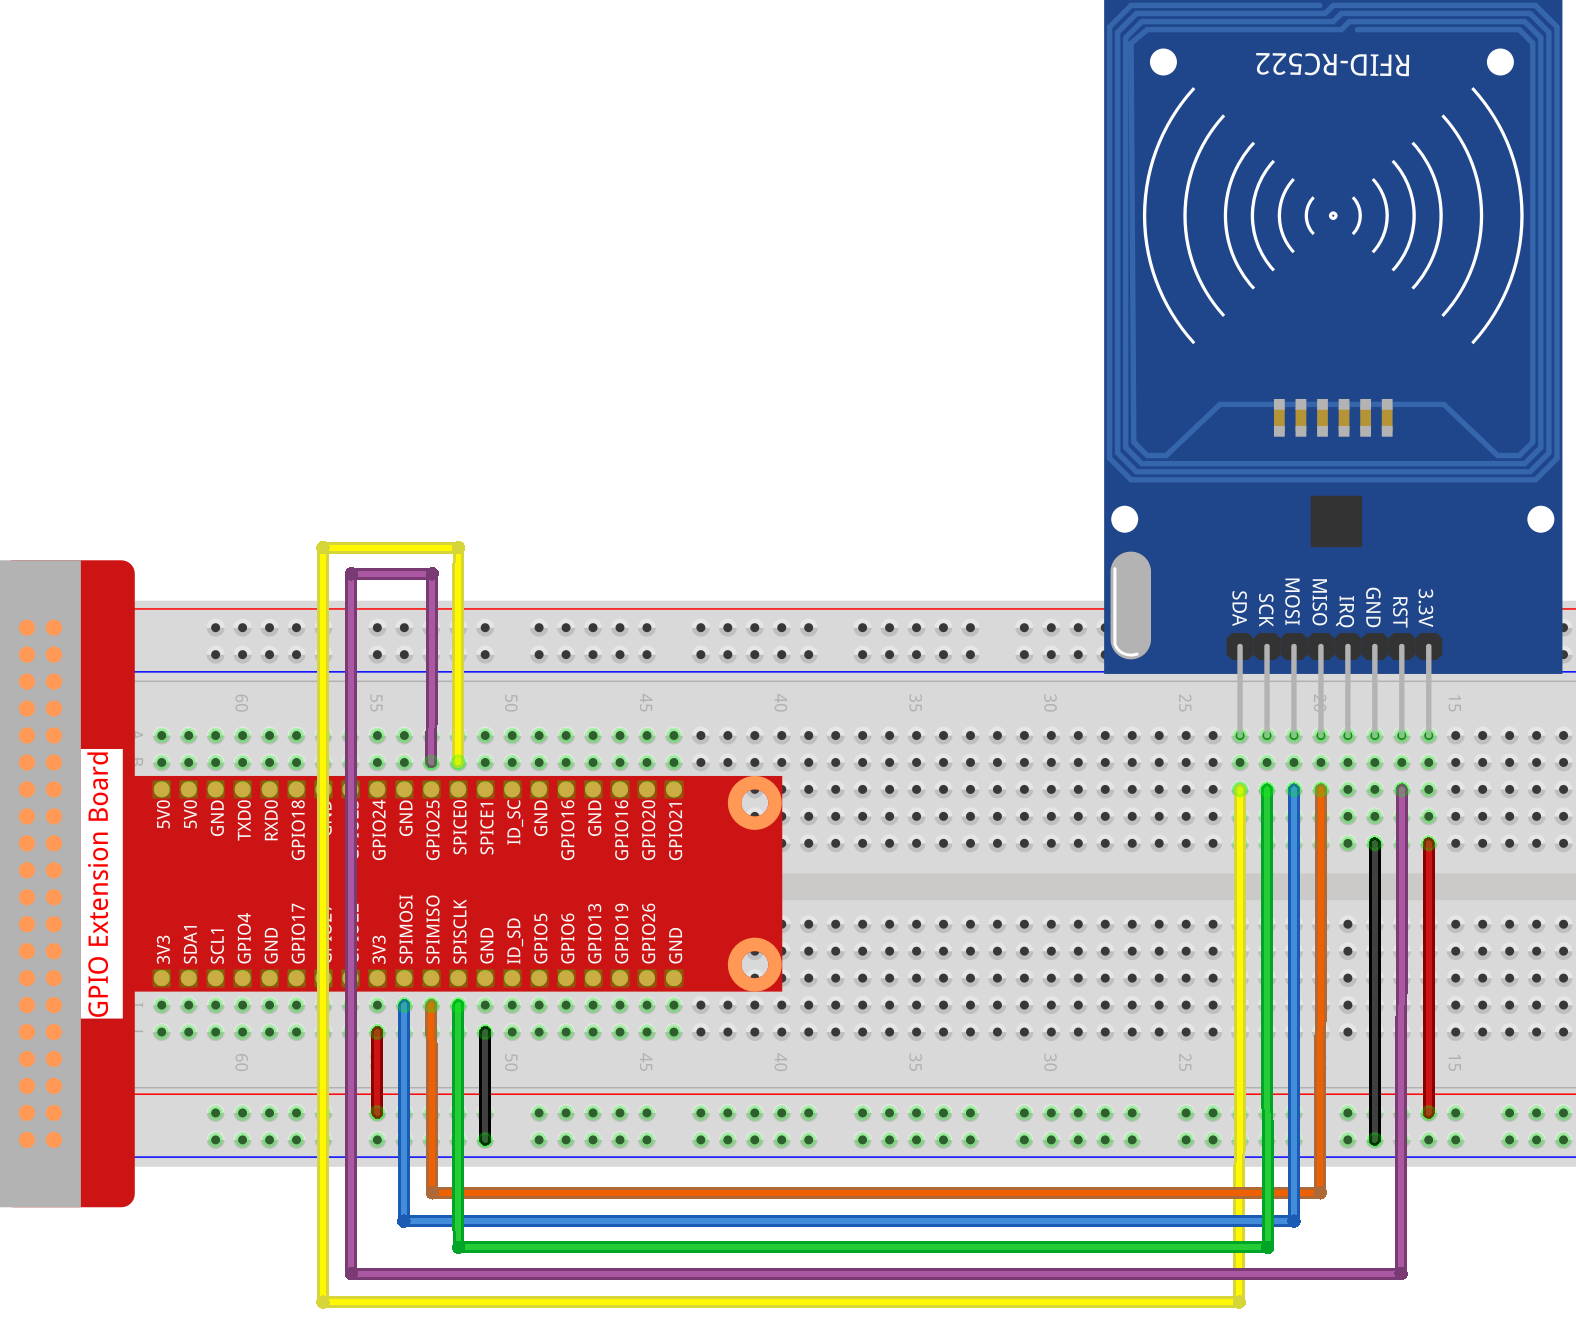
Connect
Code
Important
SPI Configuration Required: The RC522 RFID module communicates with Raspberry Pi via SPI interface. Before running the code, you need to enable SPI on your Raspberry Pi. Please refer to SPI Configuration for detailed setup instructions.
For C Language User
Go to the code folder compile and run.
cd ~/super-starter-kit-for-raspberry-pi/c/2.2.7/
make read
make write
sudo read
sudo wriet
With the code run, You can write and read the data in the card
For Python Language User
Tip
Virtual Environment Recommended: For better dependency management and system security, we recommend using a Python virtual environment. Please refer to Virtual Environment Creation for detailed setup instructions.
1.Switch directory
cd ~/super-starter-kit-for-raspberry-pi/python/2.2.7
2.Activation virtual environment
source myenv/bin/activate
3.Installation library
pip3 install spidev
pip3 install mfrc522
4.Run executable file
sudo python3 2.2.7_read.py
sudo python3 2.2.7_write.py
5.Exit the virtual environment
deactivate
For Python Language User(Pi5)
The Pi 5 version has the MFRC522.py library pre-installed, so you can run the code directly without installing dependencies.
1.Switch directory
cd ~/super-starter-kit-for-raspberry-pi/python/2.2.7_RFID_Pi5
2.Run executable file
sudo python3 2.2.7_read.py
sudo python3 2.2.7_write.py
Phenomenon