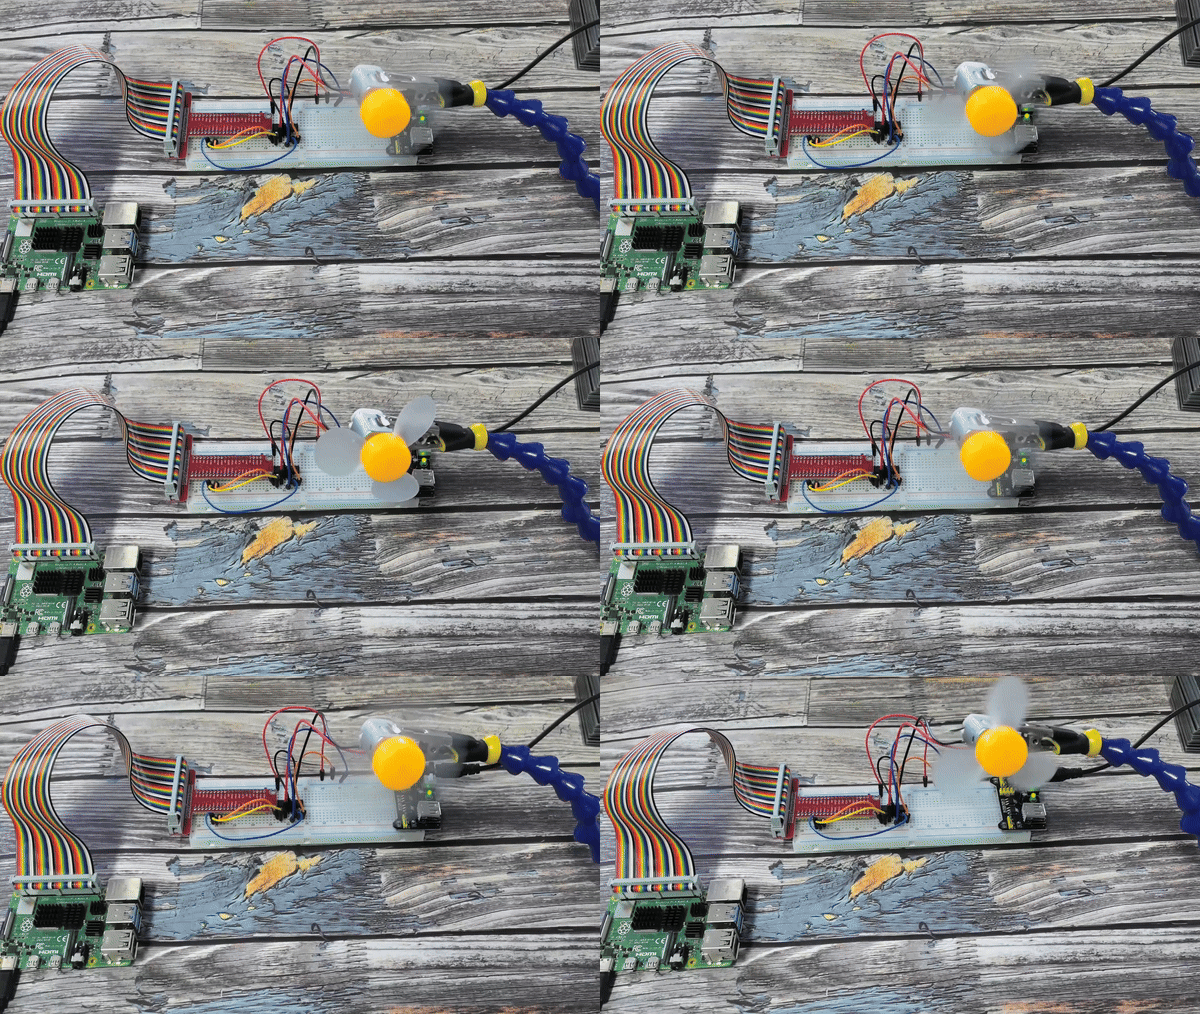
1.3.1 Motor
Introduction
In this project, we’ll learn how to control a DC motor with our Raspberry Pi, making it spin in both directions. We’ll use a special motor driver chip called L293D and a separate power supply to safely run the motor.
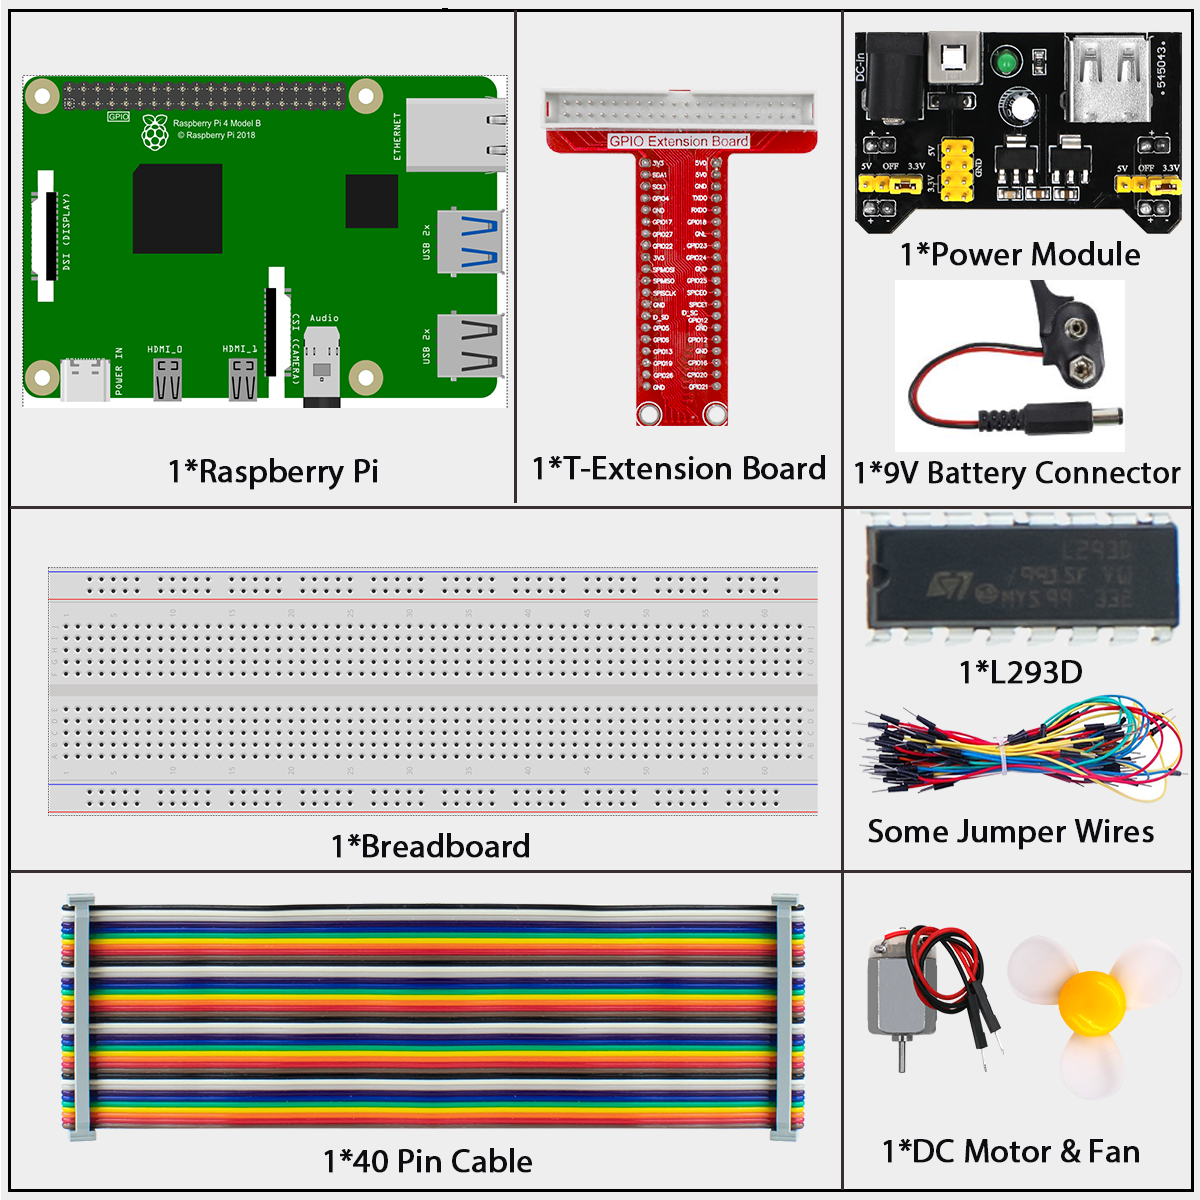
Components
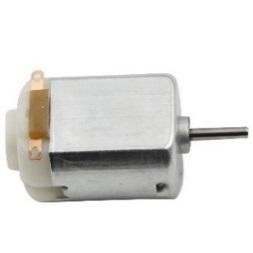
What is a DC Motor?
A DC motor is an electric motor that converts electrical energy into mechanical movement (rotation). Unlike LEDs or buzzers we’ve used before, motors: - Need more power to operate - Can spin in either direction (clockwise or counterclockwise) - Are used in toys, fans, robots, and many other moving devices
Why We Need a Motor Driver (L293D)
The Raspberry Pi can’t directly power a motor because: 1. Motors need more current than the Pi can safely provide 2. Motors can create electrical “noise” that might damage the Pi 3. The Pi can’t reverse a motor’s direction on its own
The L293D chip solves these problems by: - Acting as a bridge between the Pi and the motor - Handling the higher current needed by the motor - Allowing us to control the motor’s direction
How the L293D Works
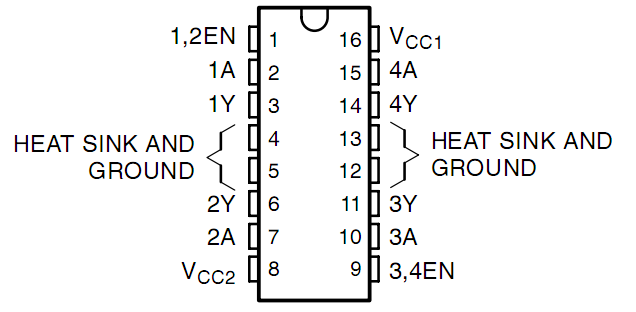
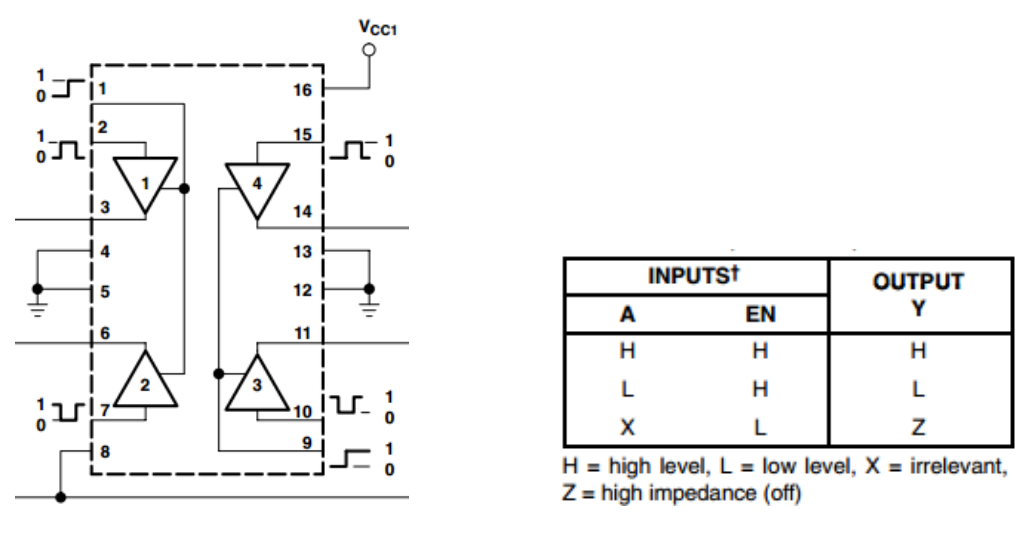
The L293D has three important types of pins: - Enable pins (EN): Turn the motor control on/off - Input pins (A): Control the direction (forward/reverse) - Output pins (Y): Connect to the motor
When EN is HIGH: - If input A is HIGH → output Y is HIGH - If input A is LOW → output Y is LOW
Power Supply Module
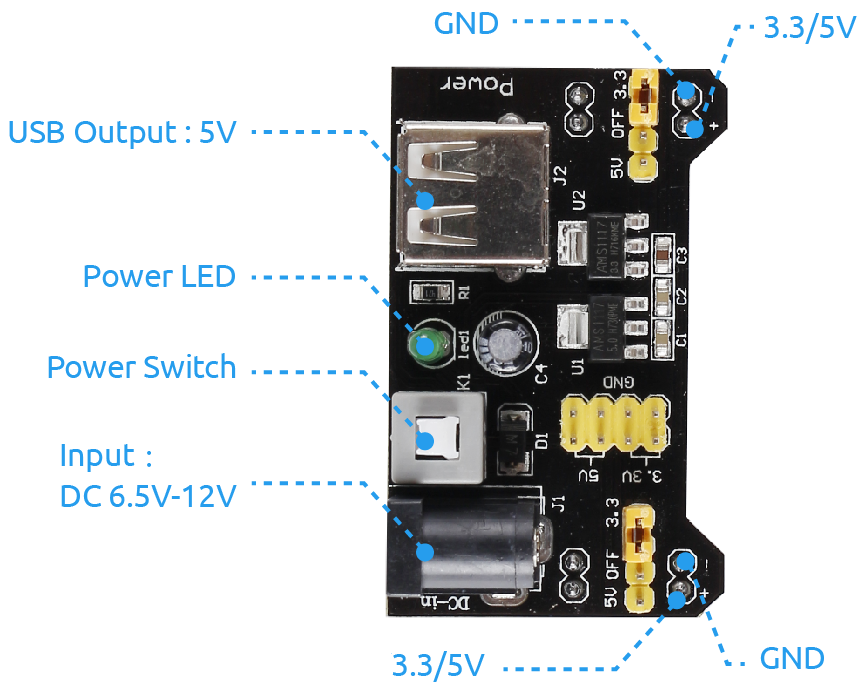
Motors need extra power, especially when starting and stopping. Using a separate power supply module: - Protects your Raspberry Pi from power spikes - Provides steady 5V power to the motor - Makes the project safer and more reliable
The power module can use a 9V battery and provides both 3.3V and 5V outputs.
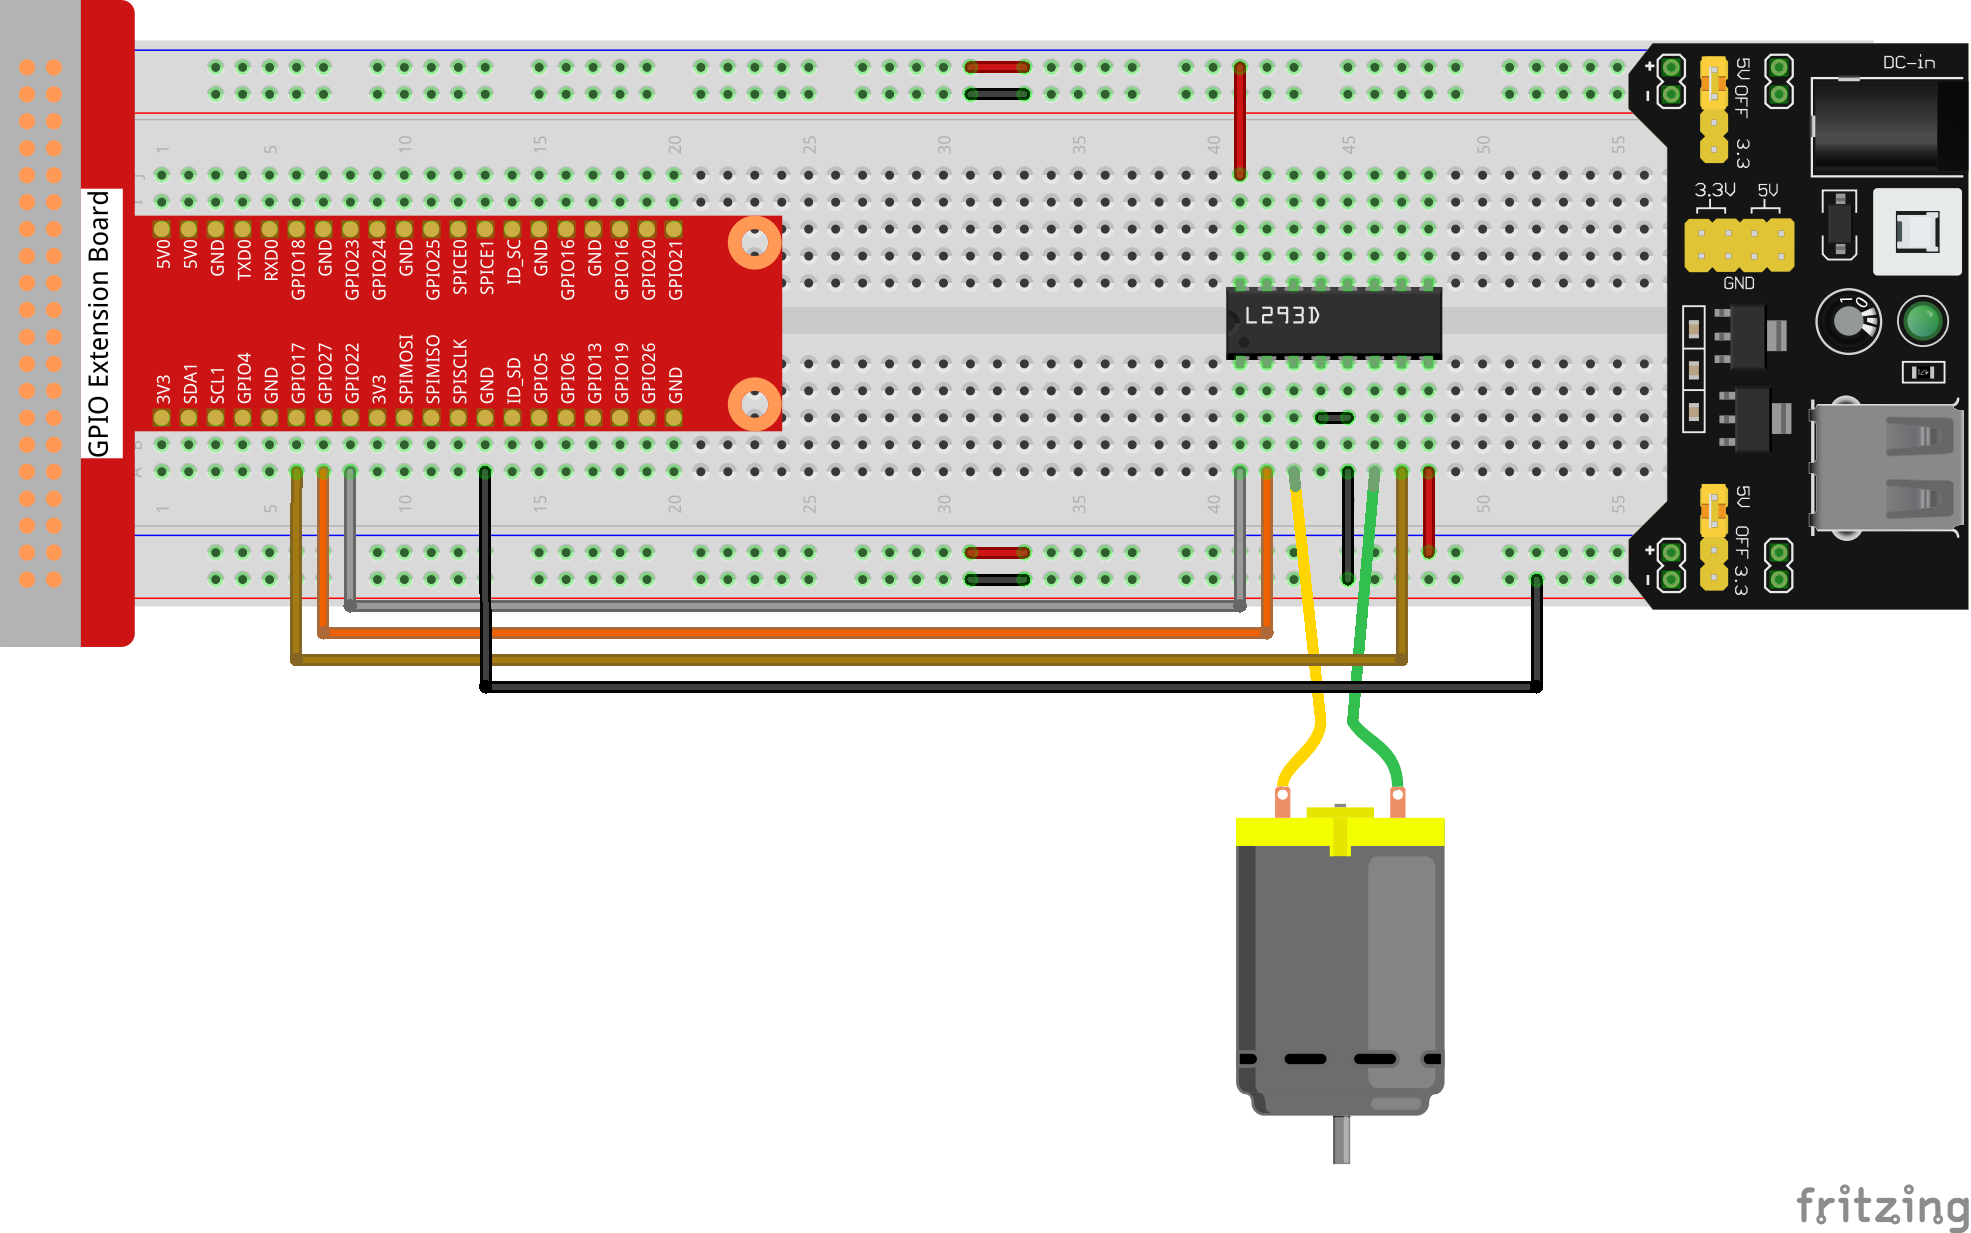
Connect
T-Board Name |
physical |
wiringPi |
BCM |
|---|---|---|---|
GPIO17 |
Pin 11 |
0 |
17 |
GPIO27 |
Pin 13 |
2 |
27 |
GPIO22 |
Pin 15 |
3 |
22 |
Note
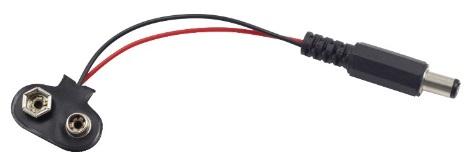
For power, you can connect a 9V battery using the battery connector included in the kit. Make sure to connect the power module’s 5V output to the breadboard’s power rail.
Code
For C Language User
Go to the code folder compile and run.
cd ~/super-starter-kit-for-raspberry-pi/c/1.3.1/
gcc 1.3.1_Motor.c -lwiringPi
sudo ./a.out
As the code runs, the motor first rotates clockwise for 5s then stops for 5s, after that, it rotates anticlockwise for 5s; subsequently, the motor stops for 5s. This series of actions will be executed repeatedly.
This is the complete code
#include <wiringPi.h>
#include <stdio.h>

// Motor control pin definitions
#define MOTOR_PIN1    0    // Motor direction pin 1
#define MOTOR_PIN2    2    // Motor direction pin 2
#define MOTOR_ENABLE  3    // Motor enable pin (speed control)

// Timing constants
#define RUN_DURATION   3000  // Motor run time in milliseconds (3 seconds)
#define STOP_DURATION  3000  // Motor stop time in milliseconds (3 seconds)
#define SHORT_DELAY    100   // Short delay for state transitions

// Motor direction definitions
#define CLOCKWISE      1
#define ANTI_CLOCKWISE 2
#define STOP           0

/**
* @brief Initializes GPIO pins for motor control
* @return 0 on success, 1 on failure
*/
int setupHardware() {
    // Initialize wiringPi library
    if (wiringPiSetup() == -1) {
        printf("Failed to setup wiringPi!\n");
        return 1;
    }

    // Configure motor control pins as outputs
    pinMode(MOTOR_PIN1, OUTPUT);
    pinMode(MOTOR_PIN2, OUTPUT);
    pinMode(MOTOR_ENABLE, OUTPUT);

    printf("Motor control hardware initialized successfully!\n");
    return 0;
}

/**
* @brief Controls motor direction and enable state
* @param direction Motor direction (CLOCKWISE, ANTI_CLOCKWISE, or STOP)
*/
void setMotorDirection(int direction) {
    switch (direction) {
        case CLOCKWISE:
            printf("Motor: Clockwise rotation\n");
            digitalWrite(MOTOR_ENABLE, HIGH);
            digitalWrite(MOTOR_PIN1, HIGH);
            digitalWrite(MOTOR_PIN2, LOW);
            break;

        case ANTI_CLOCKWISE:
            printf("Motor: Anti-clockwise rotation\n");
            digitalWrite(MOTOR_ENABLE, HIGH);
            digitalWrite(MOTOR_PIN1, LOW);
            digitalWrite(MOTOR_PIN2, HIGH);
            break;

        case STOP:
        default:
            printf("Motor: Stop\n");
            digitalWrite(MOTOR_ENABLE, LOW);
            break;
    }
    delay(SHORT_DELAY);  // Small delay for state transition
}

/**
* @brief Main motor control loop
*/
void motorControlLoop() {
    while (1) {
        // Run motor clockwise for 3 seconds
        setMotorDirection(CLOCKWISE);
        delay(RUN_DURATION);

        // Stop motor for 3 seconds
        setMotorDirection(STOP);
        delay(STOP_DURATION);

        // Run motor anti-clockwise for 3 seconds
        setMotorDirection(ANTI_CLOCKWISE);
        delay(RUN_DURATION);

        // Stop motor for 3 seconds
        setMotorDirection(STOP);
        delay(STOP_DURATION);
    }
}

/**
* @brief Main function
* @return 0 on success, 1 on failure
*/
int main(void) {
    // Initialize hardware
    if (setupHardware() != 0) {
        return 1;  // Exit if setup fails
    }

    // Start motor control loop
    motorControlLoop();

    return 0;  // This line is unreachable due to infinite loop
}
For Python Language User
Go to the code folder and run.
cd ~/super-starter-kit-for-raspberry-pi/python
python 1.3.1_Motor.py
As the code runs, the motor first rotates clockwise for 5s then stops for 5s, after that, it rotates anticlockwise for 5s; subsequently, the motor stops for 5s. This series of actions will be executed repeatedly.
This is the complete code
#!/usr/bin/env python3

 import RPi.GPIO as GPIO
 import time

 # Motor control pin definitions (BCM numbering)
 MOTOR_PIN1 = 17    # Motor direction pin 1
 MOTOR_PIN2 = 27    # Motor direction pin 2
 MOTOR_ENABLE = 22  # Motor enable pin (speed control)

 # Timing constants
 RUN_DURATION = 3.0   # Motor run time in seconds (3 seconds)
 STOP_DURATION = 3.0  # Motor stop time in seconds (3 seconds)
 SHORT_DELAY = 0.1    # Short delay for state transitions

 # Motor direction definitions
 CLOCKWISE = 1
 ANTI_CLOCKWISE = -1
 STOP = 0

 def setupHardware():
     """
     Initializes GPIO pins for motor control.
     Returns: 0 on success, 1 on failure.
     """
     try:
         # Set the GPIO modes to BCM Numbering
         GPIO.setmode(GPIO.BCM)
         GPIO.setwarnings(False)

         # Configure motor control pins as outputs
         GPIO.setup(MOTOR_PIN1, GPIO.OUT, initial=GPIO.LOW)
         GPIO.setup(MOTOR_PIN2, GPIO.OUT, initial=GPIO.LOW)
         GPIO.setup(MOTOR_ENABLE, GPIO.OUT, initial=GPIO.LOW)

         print("Motor control hardware initialized successfully!")
         return 0

     except Exception as e:
         print(f"Failed to setup GPIO: {e}")
         return 1

 def setMotorDirection(direction):
     """
     Controls motor direction and enable state.
     Parameters: direction - Motor direction (CLOCKWISE, ANTI_CLOCKWISE, or STOP)
     """
     if direction == CLOCKWISE:
         print("Motor: Clockwise rotation")
         # Set direction
         GPIO.output(MOTOR_PIN1, GPIO.HIGH)
         GPIO.output(MOTOR_PIN2, GPIO.LOW)
         # Enable the motor
         GPIO.output(MOTOR_ENABLE, GPIO.HIGH)

     elif direction == ANTI_CLOCKWISE:
         print("Motor: Anti-clockwise rotation")
         # Set direction
         GPIO.output(MOTOR_PIN1, GPIO.LOW)
         GPIO.output(MOTOR_PIN2, GPIO.HIGH)
         # Enable the motor
         GPIO.output(MOTOR_ENABLE, GPIO.HIGH)

     elif direction == STOP:
         print("Motor: Stop")
         # Disable the motor
         GPIO.output(MOTOR_ENABLE, GPIO.LOW)

     time.sleep(SHORT_DELAY)  # Small delay for state transition

 def motorControlLoop():
     """
     Main motor control loop.
     """
     # Define a dictionary to make the script more readable
     # CW as clockwise, CCW as counterclockwise, STOP as stop
     directions = {'CW': CLOCKWISE, 'CCW': ANTI_CLOCKWISE, 'STOP': STOP}

     while True:
         # Run motor clockwise for 3 seconds
         setMotorDirection(directions['CW'])
         time.sleep(RUN_DURATION)

         # Stop motor for 3 seconds
         setMotorDirection(directions['STOP'])
         time.sleep(STOP_DURATION)

         # Run motor anti-clockwise for 3 seconds
         setMotorDirection(directions['CCW'])
         time.sleep(RUN_DURATION)

         # Stop motor for 3 seconds
         setMotorDirection(directions['STOP'])
         time.sleep(STOP_DURATION)

 def destroy():
     """
     Clean up function for GPIO resources.
     """
     # Stop the motor
     GPIO.output(MOTOR_ENABLE, GPIO.LOW)
     print("Motor stopped")

     # Release resource
     GPIO.cleanup()
     print("GPIO cleanup completed")

 def main():
     """
     Main function.
     Returns: Integer status code. 0 for success, 1 for error.
     """
     # Initialize hardware
     if setupHardware() != 0:
         return 1  # Exit if setup fails

     try:
         # Start motor control loop
         motorControlLoop()
     except KeyboardInterrupt:
         # When 'Ctrl+C' is pressed, the program destroy() will be executed
         print("\nProgram interrupted by user")
         destroy()
         return 0
     except Exception as e:
         print(f"An error occurred: {e}")
         destroy()
         return 1

 # If run this script directly, do:
 if __name__ == '__main__':
     main()
Phenomenon